> For the complete documentation index, see [llms.txt](https://docs.wonderchat.io/llms.txt). Markdown versions of documentation pages are available by appending `.md` to page URLs; this page is available as [Markdown](https://docs.wonderchat.io/setup-guides/styling-your-chatbot/how-to-use-homepage-widget-feature.md).
# How to use Homepage Widget Feature
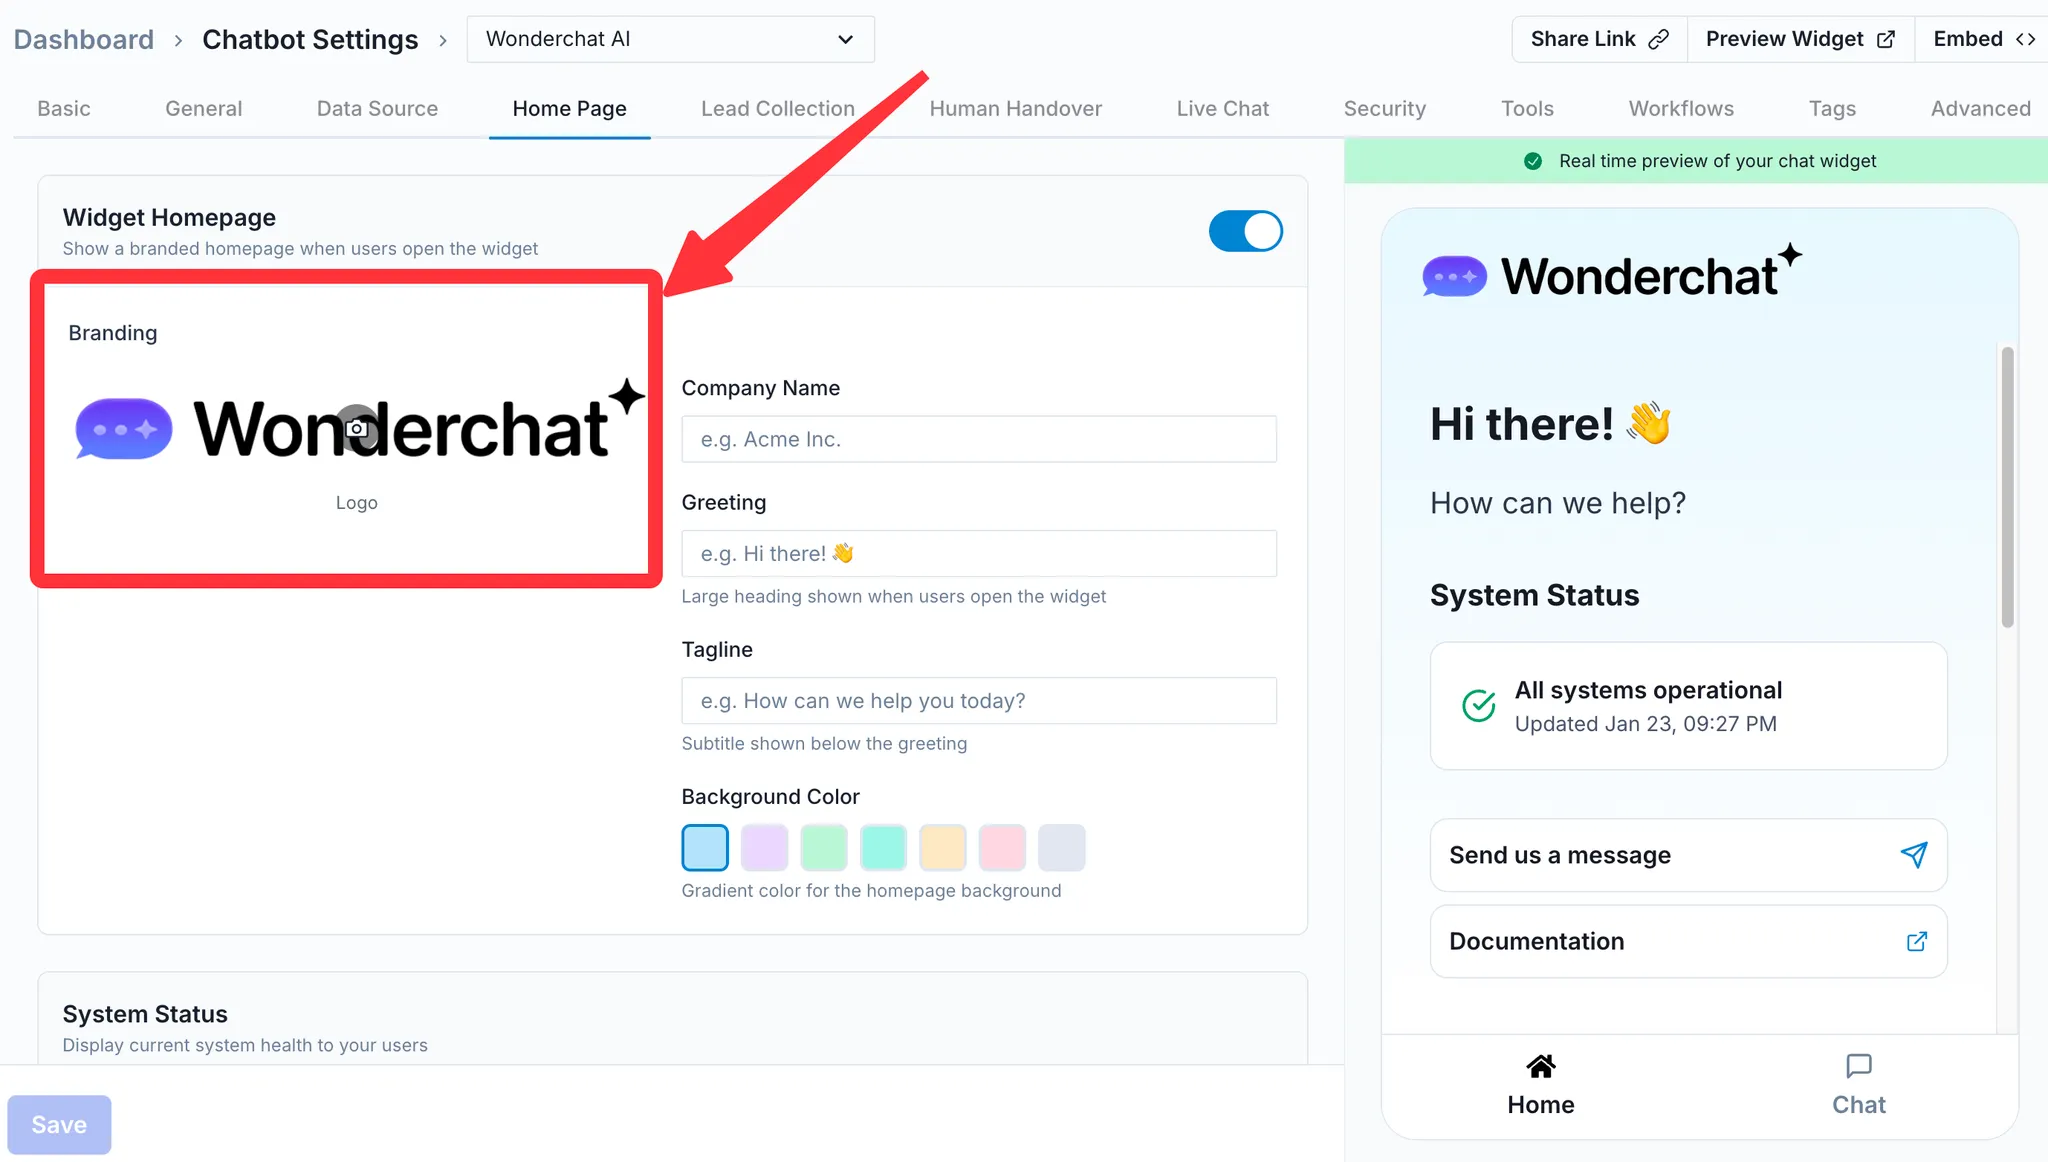
The Widget Homepage allows you to show a branded landing screen when users open your chat widget. It improves the experience by displaying a welcome message, system status, announcements.
### ✅ How to Enable the Widget Homepage
1. Go to **Settings → Home Page**
2. Turn **ON** the toggle in the top-right corner (**Widget Homepage**)
3. Click **Save**
Once enabled, users will see the homepage inside the widget before entering the chat.
***
## Branding Section
This section controls the main identity and look of your widget homepage.
#### 1) Logo
Upload your company logo to personalize the widget.
* Recommended: Square logo (PNG or SVG)
* This logo appears on the homepage header area
***
#### 2) Company Name
Enter your business name to display on the homepage.
Example:
**Acme Inc.**
***
#### 3) Greeting
This is the large headline shown when users open the widget.
Example:
**Hi there! 👋**
✅ Best practices:
* Keep it short and friendly
* Use an emoji if it matches your brand tone
***
#### 4) Tagline
A short subtitle shown under the greeting.
Example:
**How can we help you today?**
✅ Best practices:
* Make it action-focused (support, sales, onboarding, etc.)
* Keep it under 1 sentence
***
#### 5) Background Color
Choose the **gradient background color** for the widget homepage.
Available options are displayed as color tiles.
This affects the visual style of the homepage area behind the greeting.
***
## System Status
You can display a system health indicator to visitors.
#### Status Dropdown Options
Select the status:
* **Operational, Degraded or Major Outage**
#### Status Message (Optional)
Add an extra message to provide more context.
Examples:
* “All services running normally.”
* “We’re experiencing delays with responses.”
✅ This status appears in the widget preview as a status card (ex: “All systems operational”).
***
## Announcements
Use announcements to highlight updates, alerts, or important messages for users.
#### Add a New Announcement
1. Go to **Announcements**
2. Click **+ Add**
3. Create your announcement content
4. Save
Examples of announcements:
* “🎉 New feature released!”
* “⚠️ Scheduled maintenance tonight at 11PM”
* “📢 Free onboarding sessions available”
***
## Homepage Content (Example Questions + Quick Links)
This section displays content configured in your **Chat Menu settings**, and then shown automatically on the homepage.
#### Example Questions
These are suggested messages users can tap to start conversations faster.
Example ideas:
* “How do I get started?”
* “Can I talk to support?”
* “What pricing plans do you offer?”
#### Quick Links
Clickable shortcuts inside the widget homepage (ex: Help Center, Contact page, Pricing page).
Example ideas:
* “Pricing”
* “Documentation”
* “Book a demo”
#### Editing Homepage Content
In this section, click **Edit in Chat Menu** to manage:
* Example Questions
* Quick Links
✅ After you update them in **Chat Menu**, they will automatically appear on the homepage.
***
## Live Preview
On the right side of the screen, Wonderchat shows a **real-time preview** of your chat widget homepage.
This lets you confirm the design, greeting text, and status display before saving changes.
***
## Save Your Changes
Always click **Save** (bottom-left) to apply your homepage configuration to the live widget.