> For the complete documentation index, see [llms.txt](https://docs.wonderchat.io/llms.txt). Markdown versions of documentation pages are available by appending `.md` to page URLs; this page is available as [Markdown](https://docs.wonderchat.io/setup-guides/adding-your-chatbot-to-your-website/embedding-for-framer.md).

# Embedding for Framer

### Connecting Wonderchat with Framer: A Step-by-Step Guide

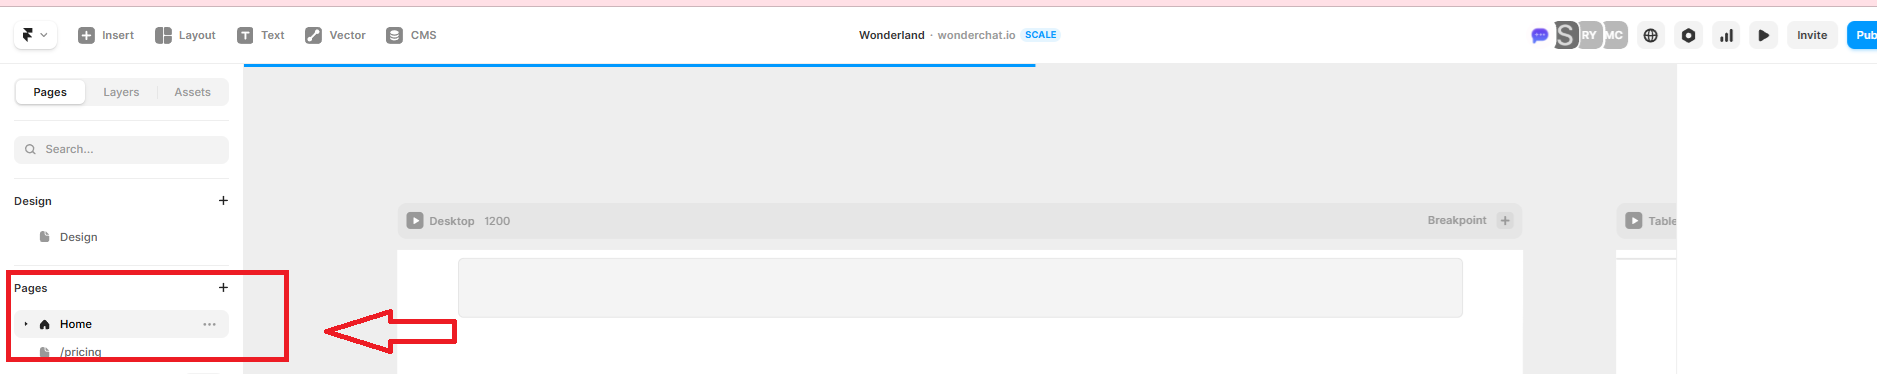
* Open your Framer page.
* Pass your mouse above "home"
* Click on the three dots in the top right corner.

<figure><img src="https://3760420285-files.gitbook.io/~/files/v0/b/gitbook-x-prod.appspot.com/o/spaces%2F0WUvfmkdMPXz3x7NXP8i%2Fuploads%2F64RpWaVR9tgGE902Bnkk%2Fimage.png?alt=media&amp;token=e3b5f726-e77a-4c2c-8908-797cdcb56e06" alt=""><figcaption></figcaption></figure>

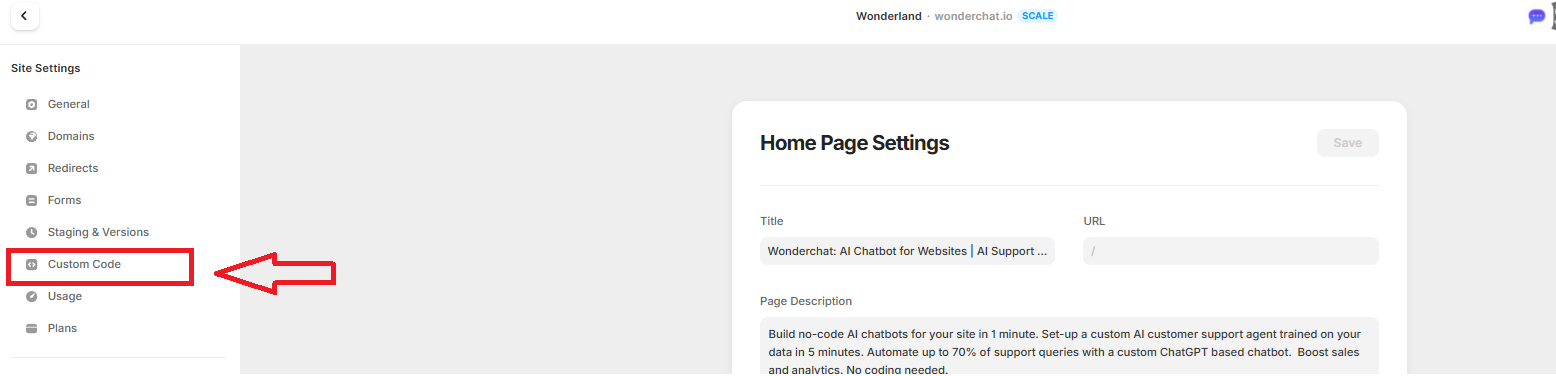
* Select 'Settings' from the dropdown menu.
* In the Settings menu, look for the left sidebar.
* Click on the option labeled 'Custom Code"

<figure><img src="https://3760420285-files.gitbook.io/~/files/v0/b/gitbook-x-prod.appspot.com/o/spaces%2F0WUvfmkdMPXz3x7NXP8i%2Fuploads%2FnlViAEcQkB0WFqXf7kAF%2Fimage.png?alt=media&amp;token=f7b4cb21-c64d-44b6-a14c-9eac6f8afa3f" alt=""><figcaption></figcaption></figure>

.

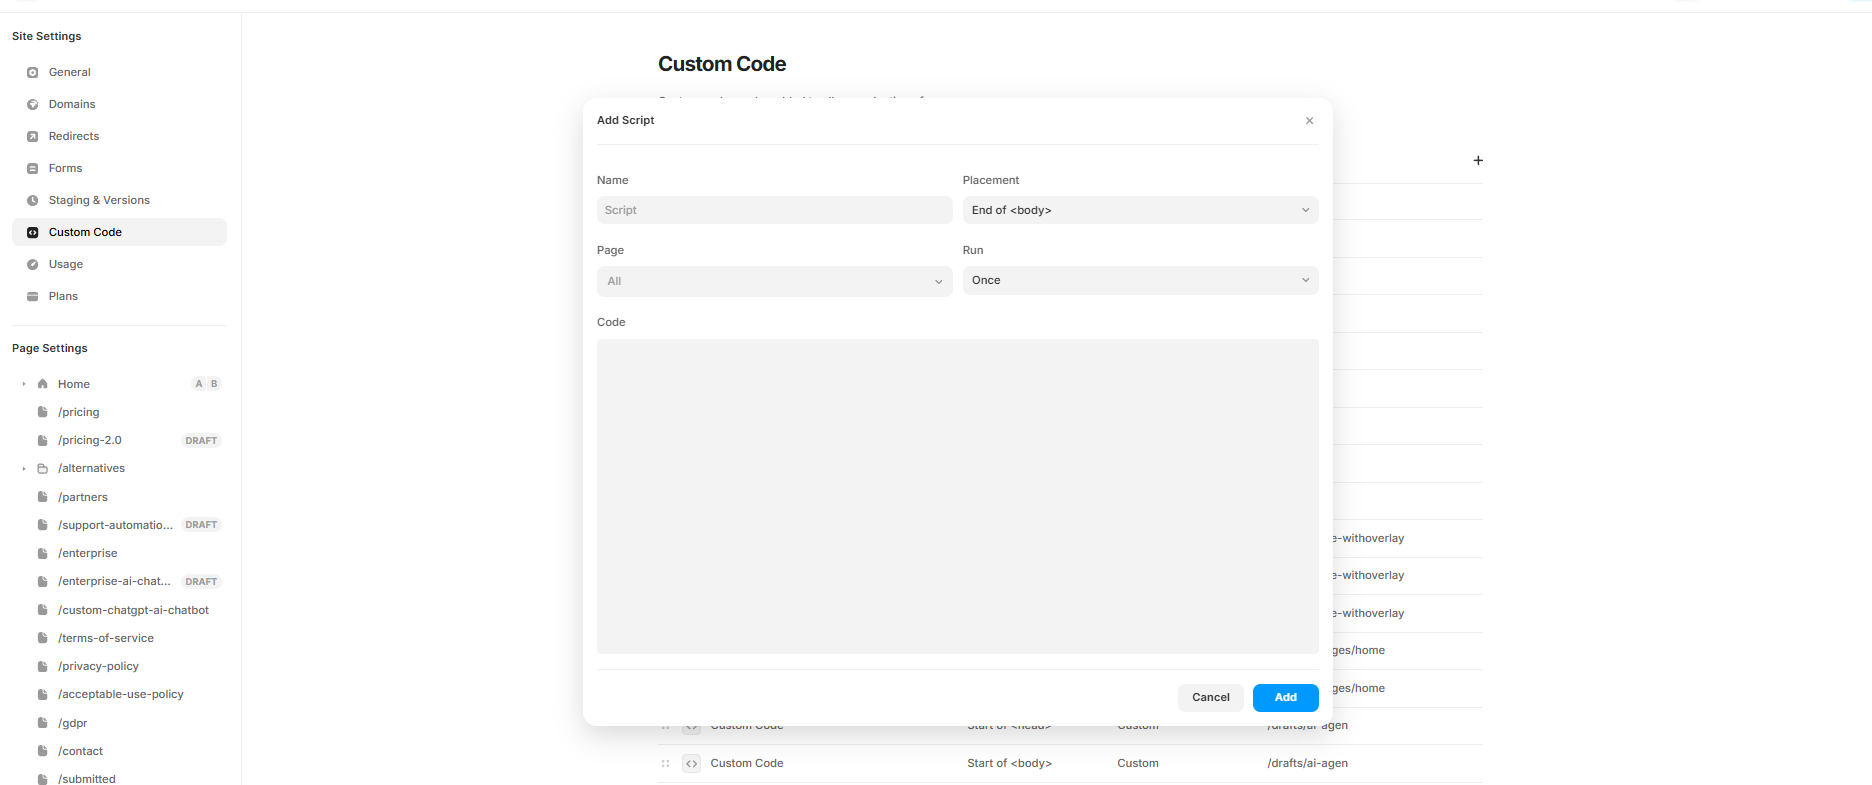
* Click on '+' to create a new script.

<figure><img src="https://3760420285-files.gitbook.io/~/files/v0/b/gitbook-x-prod.appspot.com/o/spaces%2F0WUvfmkdMPXz3x7NXP8i%2Fuploads%2FJ2hrKwCGVbkcUNQLnImt%2Fimage.png?alt=media&amp;token=b00e5967-34dc-4b3a-8895-39a61d08aa3d" alt=""><figcaption></figcaption></figure>

**Configure Wonderchat Code**

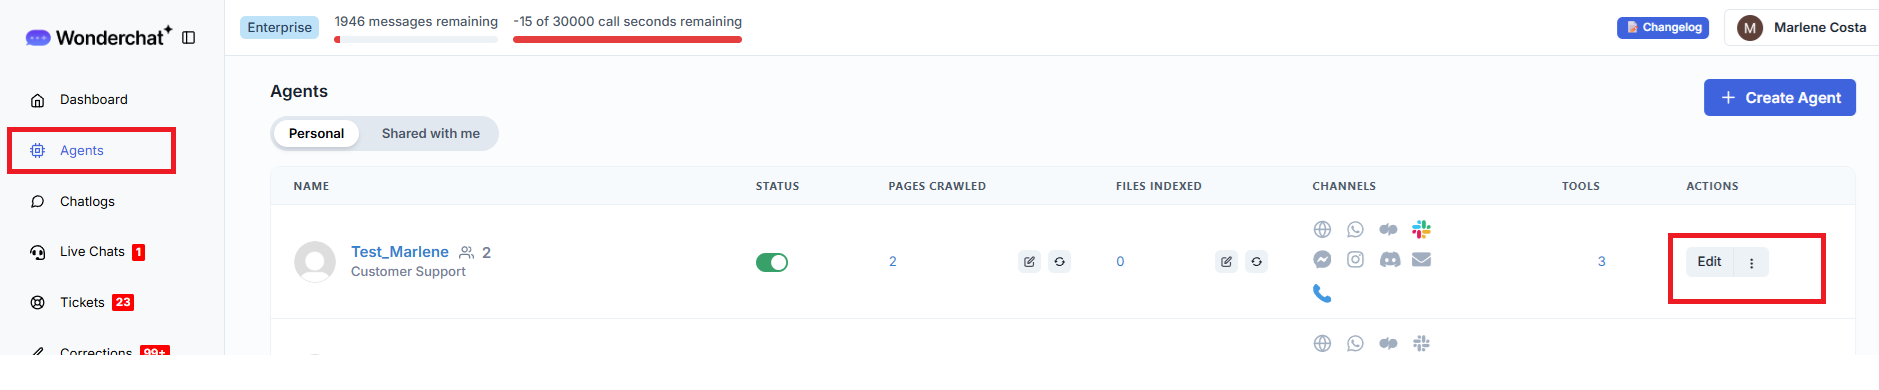
* Go to your Agents page on Wonderchat dashboard.
* Click on the three dots to edit your chatbot.

<figure><img src="https://3760420285-files.gitbook.io/~/files/v0/b/gitbook-x-prod.appspot.com/o/spaces%2F0WUvfmkdMPXz3x7NXP8i%2Fuploads%2FlAmxvoLNDm7ZwhFoyr21%2Fimage.png?alt=media&amp;token=326439f8-73d7-4e21-9bf9-be96105723a2" alt=""><figcaption></figcaption></figure>

* Select the option to "embed to website"
* A new tab will open where you can configure your bot settings:

  * Set the configuration
  * Choose widget size
  * Set position
  * Adjust display options
  * Modify behavior options.

  <figure><img src="https://3760420285-files.gitbook.io/~/files/v0/b/gitbook-x-prod.appspot.com/o/spaces%2F0WUvfmkdMPXz3x7NXP8i%2Fuploads%2FilwBc7gwCoU2buhFsqjh%2Fimage.png?alt=media&amp;token=3f270b31-059e-4c94-9f1b-1020b394478b" alt=""><figcaption></figcaption></figure>
* Once satisfied with your settings, click 'Copy to Clipboard'.
* Paste the copied script under the code section.

**Set Script Details**

<figure><img src="https://3760420285-files.gitbook.io/~/files/v0/b/gitbook-x-prod.appspot.com/o/spaces%2F0WUvfmkdMPXz3x7NXP8i%2Fuploads%2FhLeGAm90yrXiiBsT1Ewo%2Fimage.png?alt=media&amp;token=ce5c6129-ea0e-4b34-a7bd-285591639245" alt=""><figcaption></figcaption></figure>

* Assign a name for the script.
* Choose the correct placement for the script.
* Select the pages where you want the bot to appear.
* Decide when the script should run (e.g., on every page visit).
* After confirming all settings, click 'Publish' to apply changes to your Framer pages.

<figure><img src="https://3760420285-files.gitbook.io/~/files/v0/b/gitbook-x-prod.appspot.com/o/spaces%2F0WUvfmkdMPXz3x7NXP8i%2Fuploads%2FsyGvjn7bAX1EskUUxOh7%2Fimage.png?alt=media&amp;token=1faef8f9-69b3-4425-acf7-0f088ccd098a" alt=""><figcaption></figcaption></figure>

* You have successfully connected Wonderchat with Framer.