> For the complete documentation index, see [llms.txt](https://docs.wonderchat.io/llms.txt). Markdown versions of documentation pages are available by appending `.md` to page URLs; this page is available as [Markdown](https://docs.wonderchat.io/integration-guides/meeting-scheduler.md).

# Meeting Scheduler

Guide on Integrating Wonderchat with Calendly, HubSpot Meetings, Cal.com, or any other meeting scheduling provider

This guide explains how to connect Wonderchat with a meeting scheduling provider - **Calendly**, **HubSpot Meetings**, **Cal.com**, or any other booking link - allowing users to book appointments directly through your chatbot for a seamless scheduling experience.

***

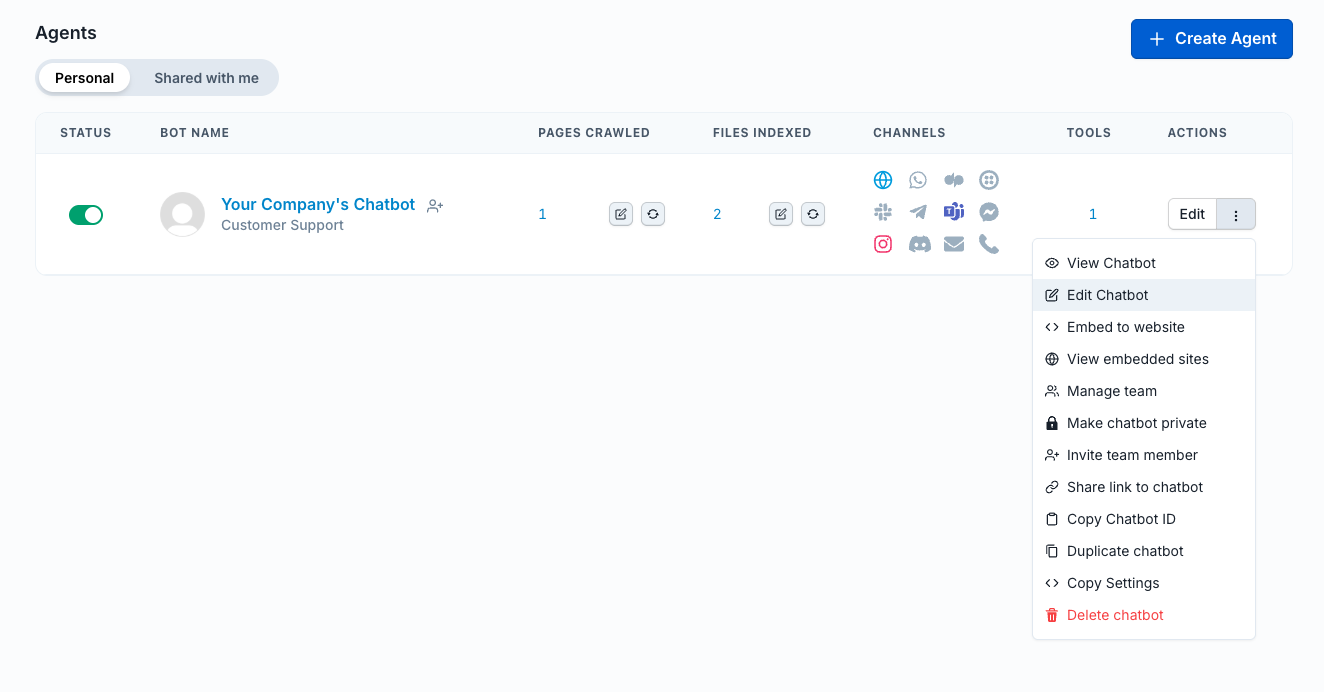
1. Go to Dashboard > **Actions** > "Edit Chatbot"

<figure><img src="https://3760420285-files.gitbook.io/~/files/v0/b/gitbook-x-prod.appspot.com/o/spaces%2F0WUvfmkdMPXz3x7NXP8i%2Fuploads%2Fgit-blob-e2bfb5a0611dd8b873d13fd504a19ed4b48fca05%2Fimage.png?alt=media" alt=""><figcaption><p>Click on "<strong>Edit Chatbot</strong>"</p></figcaption></figure>

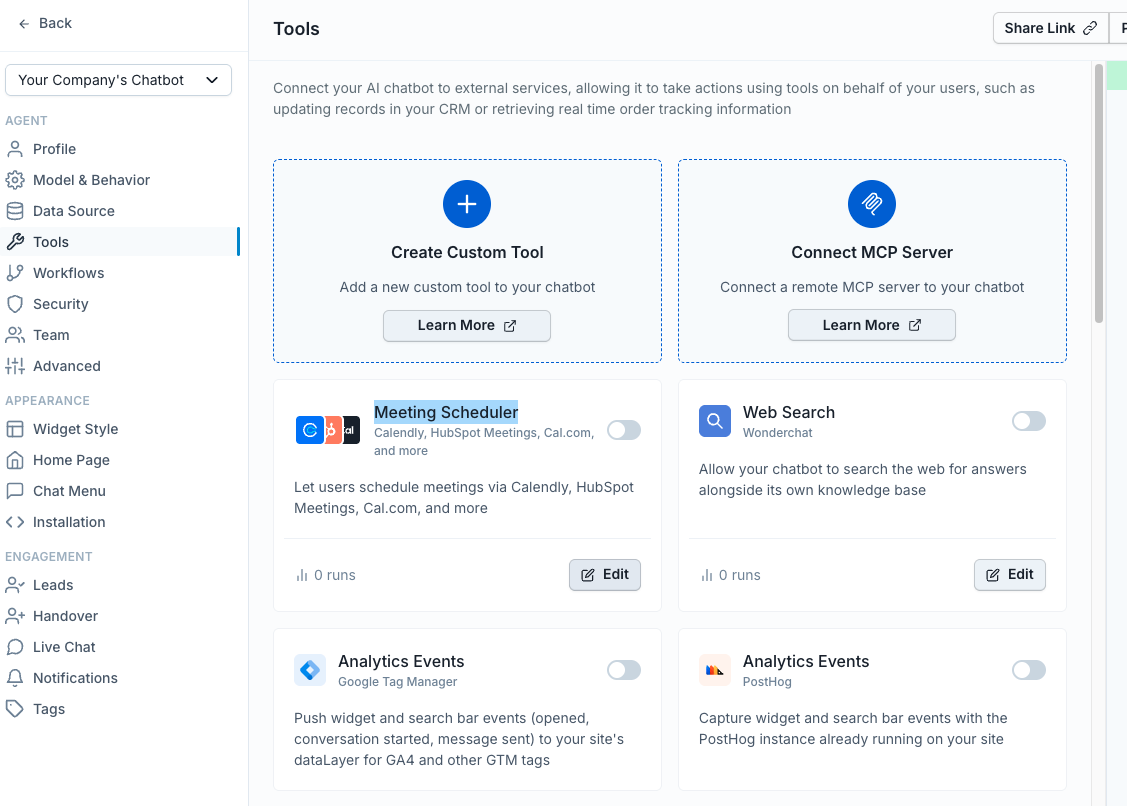
2. Go to the **Tools** tab, find the **"Meeting Scheduler"** card, and click **Edit**

<figure><img src="https://3760420285-files.gitbook.io/~/files/v0/b/gitbook-x-prod.appspot.com/o/spaces%2F0WUvfmkdMPXz3x7NXP8i%2Fuploads%2Fgit-blob-91ae4986bea9da90877ca9e95d480d43bba1fe1b%2Fimage.png?alt=media" alt=""><figcaption><p>Click "Edit" on the "Meeting Scheduler" card under the Tools tab</p></figcaption></figure>

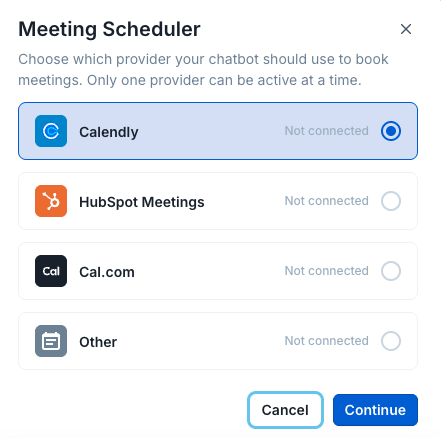
3. Choose your provider

Select **Calendly**, **HubSpot Meetings**, **Cal.com**, or **Other** (any generic booking link), then click **Continue**.

<figure><img src="https://3760420285-files.gitbook.io/~/files/v0/b/gitbook-x-prod.appspot.com/o/spaces%2F0WUvfmkdMPXz3x7NXP8i%2Fuploads%2Fgit-blob-5d8c0706f3a0a2a4dbda861f53f65fab7d048e8c%2Fimage.png?alt=media" alt=""><figcaption><p>Choose which provider your chatbot should use to book meetings</p></figcaption></figure>

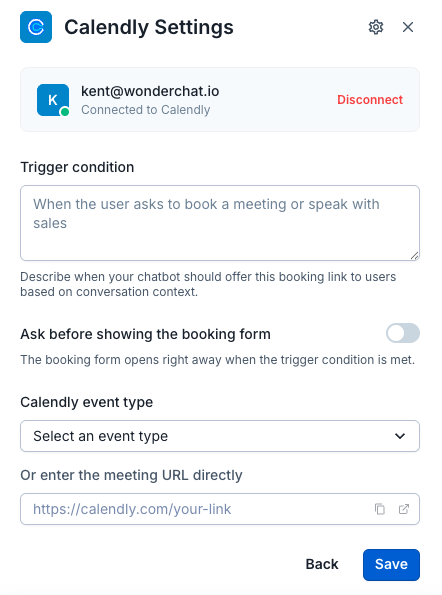
4. Connect your account, set the trigger condition, and paste your booking link

* **Connect your account** - optionally connect your provider account via OAuth for richer booking analytics (shown here as "Connected to Calendly", with a **Disconnect** option). This isn't required to use the scheduler.
* **Trigger condition** - describe when your chatbot should offer this booking link based on conversation context (e.g. "When the user asks to book a meeting or speak with sales").
* **Ask before showing the booking form** - when enabled, the chatbot asks the user if they'd like to book first, then opens the form. When disabled, the booking form opens immediately once the trigger condition is met.
* **Booking link** - select an event type from the dropdown (available once your account is connected), or enter the meeting URL directly. Each provider validates its link format automatically - for example, a Calendly link must start with `https://calendly.com/`.

Click **Save** to confirm changes.

<figure><img src="https://3760420285-files.gitbook.io/~/files/v0/b/gitbook-x-prod.appspot.com/o/spaces%2F0WUvfmkdMPXz3x7NXP8i%2Fuploads%2Fgit-blob-fd24b516bb8653b60e37ae4b09d0bf01d89a0ecd%2Fimage.png?alt=media" alt=""><figcaption><p>Connect your account, set the trigger condition, and enter your booking link</p></figcaption></figure>

5. Find the "Book a Meeting" button in your chatbot
6. Clicking on the "Book a meeting" button allows users to schedule a meeting with you.
7. Once a date is selected, they can enter their details and book a meeting just like they would through your webpage.

***

If you have any more questions, feel free to reach out to us at <mark style="color:purple;">**<support@wonderchat.io>**</mark>